|
| Flickr/The British Monarchy; Hugo Burnand The Royal Wedding at Buckingham Palace on 29th April 2011: The Bride and Groom, TRH The Duke and Duchess of Cambridge in the centre with attendants, (clockwise from bottom right) The Hon. Margarita Armstrong-Jones, Miss Eliza Lopes, Miss Grace van Cutsem, Lady Louise Windsor, Master Tom Pettifer, Master William Lowther-Pinkerton, Taken in the Throne Room. |
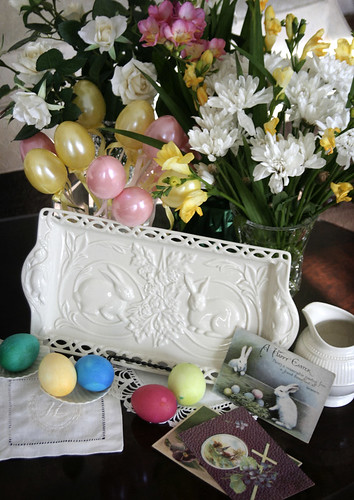
Amazing, but true, the Fiona Cairns Royal Wedding Cake recipe has been made public. Of course, Cairns found the recipe in a Victorian cookbook, so she may not feel it is so secret and being that old, it is definitely not copyrighted. So no need to look elsewhere, I have it right here for all of you.
This fruit cake recipe is for 120-150 people. Don't limit yourself to large weddings though. Fruit cakes are already regaining huge popularity in the U.S. thanks to Kate, so think large graduation parties, and Christmas gifts, not doorstops. This cake recipe without the decorations would make 15 smaller cakes to serve 10, or follow Cairns footsteps and bake hundreds of them in baked bean cans for Christmas. Just the right size and quantity for gift giving, and ... perfect wedding favors too.
Everyone will want one!
Tweet

This post shared with Eating in Winnipeg.
Read more about the Royal Wedding:
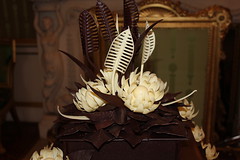
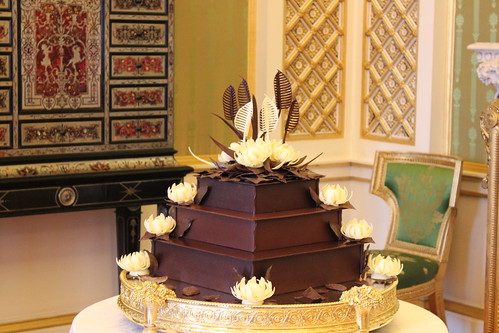
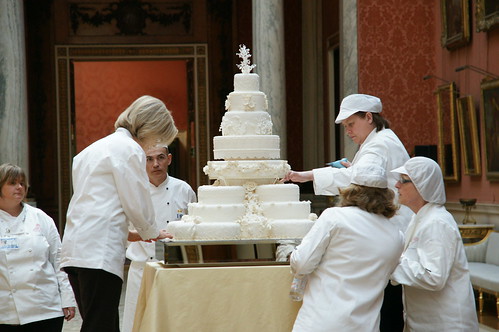
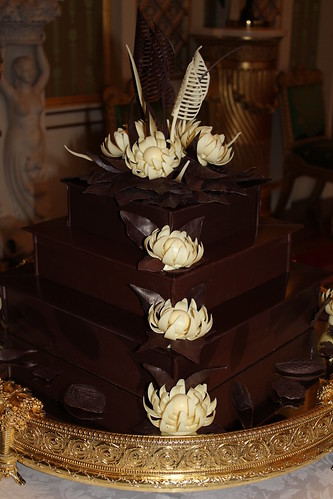
The two Royal Wedding Cakes in full color, in all their glory
Royal Wedding Cakes by the numbers: Get the facts
Royal Wedding cake designers interviewed and Queen Mother's 1923 Cake
Betty Crocker proposes four royal wedding cakes fit for Prince William and Kate Middleton on April 29th
Royal wedding cake to be decorated in Joseph Lambeth style
Cairns and McVitie's to create 2 royal wedding cakes
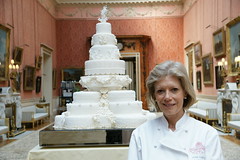
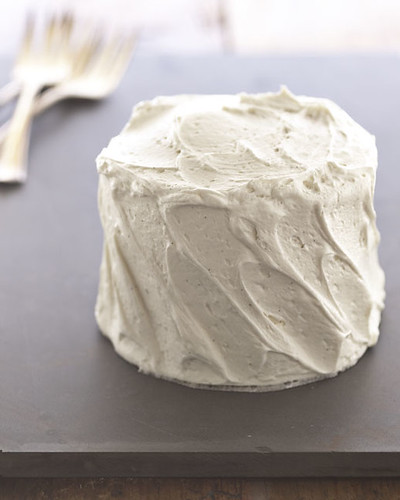
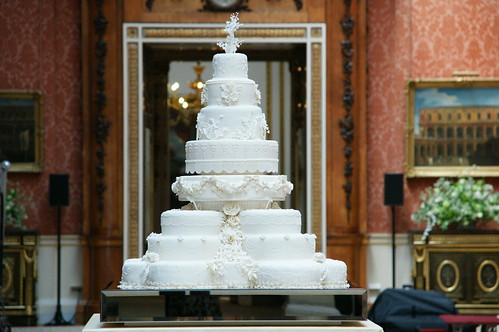
Vintage Glamour Wedding Cake
Served at Prince William’s and Princess Catherine’s Royal Wedding Reception, April 29, 2011
Serves about 120-150 people
A Note From Pastry Chef Fiona Cairns:
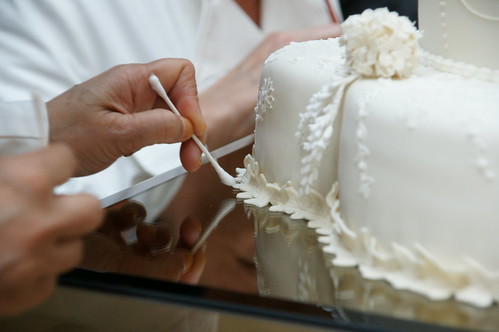
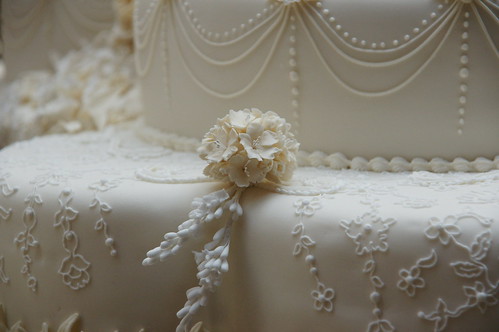
A beautiful three-tiered timeless classic, this could take center stage at any wedding feast. It can be baked and decorated at least a month in advance and there are no colors to mix as the entire scheme is in ivory fondant with highlights of gold (you could also make this cake in white and gold.) If you break down each stage, giving yourself plenty of time, you may find it easier than you think.
Served at Prince William’s and Princess Catherine’s Royal Wedding Reception, April 29, 2011
Serves about 120-150 people
A Note From Pastry Chef Fiona Cairns:
A beautiful three-tiered timeless classic, this could take center stage at any wedding feast. It can be baked and decorated at least a month in advance and there are no colors to mix as the entire scheme is in ivory fondant with highlights of gold (you could also make this cake in white and gold.) If you break down each stage, giving yourself plenty of time, you may find it easier than you think.
 |
| Flickr/The British Monarchy |
Ingredients for the Cake:
One 6-inch square (3-inch deep) square cake pan
One 8-inch square (3-inch deep) square cake pan
One 10-inch square (3-inch deep) square cake pan
Double the recipe for Rich Tamarind Fruit Cake batter (recipe below)
6 tablespoons brandy, plus more to feed the cake
1 cup apricot jam, gently warmed and pushed through a sieve
6 3/4 pounds marzipan
confectioners’ sugar, for rolling
Sizes for Cake Boards and Drums:
One 8-inch square thin board
One 10-inch square thin board
One 12-inch square thin board
One 6-inch square (1/2-inch thick) cake drum
One 8-inch square (1/2-inch thick) cake drum
One 10-inch square (1/2-inch thick) cake drum
Preparing the Rich Tamarind Fruit Cake:
Single cake makes 25-30 slices
A Note from Fiona Cairns About the Recipe:
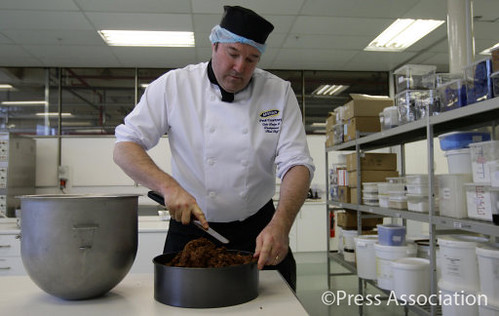
I started my business using this particularly moist, dark recipe as a Christmas cake, producing hundreds of miniatures cooked in baked bean cans from my kitchen table. It has been tweaked by adding tamarind — my husband’s bright idea. Make it up to three months in advance, or at least a week before you want it, to let it mature and absorb the brandy.
Ingredients for the Fruit Cake:
1 1/2 cups candied cherries
2 cups golden raisins
2 cups dark raisins, preferably Thompson
1 1/4 cups mixed candied citrus peel
2/3 cup chopped crystallized ginger
1/2 cup dried currants
3 tablespoons molasses
3 tablespoons bitter orange marmalade
1 teaspoon tamarind concentrate
finely grated zest of 1 organic orange
finely grated zest of 1 organic lemon
1 heaped tablespoon apple pie spice
6 tablespoons brandy, plus 3 tablespoons to feed the cake
1 cup walnuts
1/3 cup blanched almonds
1 1/4 cups self-rising flour
1 teaspoon salt
1 cup plus 2 tablespoons unsalted butter, softened, plus more for the pan
1 cup plus 2 tablespoons packed brown sugar
1 1/2 cups almond flour
5 large eggs, lightly beaten
One 8-inch square thin board
One 10-inch square thin board
One 12-inch square thin board
One 6-inch square (1/2-inch thick) cake drum
One 8-inch square (1/2-inch thick) cake drum
One 10-inch square (1/2-inch thick) cake drum
Preparing the Rich Tamarind Fruit Cake:
Single cake makes 25-30 slices
A Note from Fiona Cairns About the Recipe:
I started my business using this particularly moist, dark recipe as a Christmas cake, producing hundreds of miniatures cooked in baked bean cans from my kitchen table. It has been tweaked by adding tamarind — my husband’s bright idea. Make it up to three months in advance, or at least a week before you want it, to let it mature and absorb the brandy.
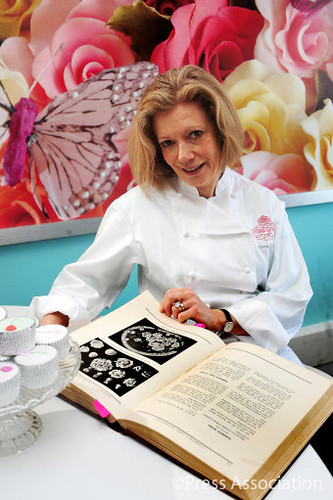 |
| Flickr/The British Monarchy Fiona Cairns looking at a Victorian recipe book in Fleckney, Leicestershire. |
1 1/2 cups candied cherries
2 cups golden raisins
2 cups dark raisins, preferably Thompson
1 1/4 cups mixed candied citrus peel
2/3 cup chopped crystallized ginger
1/2 cup dried currants
3 tablespoons molasses
3 tablespoons bitter orange marmalade
1 teaspoon tamarind concentrate
finely grated zest of 1 organic orange
finely grated zest of 1 organic lemon
1 heaped tablespoon apple pie spice
6 tablespoons brandy, plus 3 tablespoons to feed the cake
1 cup walnuts
1/3 cup blanched almonds
1 1/4 cups self-rising flour
1 teaspoon salt
1 cup plus 2 tablespoons unsalted butter, softened, plus more for the pan
1 cup plus 2 tablespoons packed brown sugar
1 1/2 cups almond flour
5 large eggs, lightly beaten
Preparing the Fruit Cake Batter:
The day before, rinse the cherries, then dry them well with paper towels and cut each in half. Place the golden and dark raisins, mixed peel, ginger, currants, cherries, molasses, marmalade, tamarind paste, zests and spice into a large bowl. Pour in 6 tablespoons of brandy, stir well, cover with plastic wrap and let stand overnight.
The next day, preheat the oven to 275 degrees F. Lightly butter a 9-inch springform pan and line the bottom and sides with parchment paper. Wrap the outside of the pan with brown paper and tie with string, to protect the cake from scorching in the oven.
Spread the nuts on a baking sheet. Bake for 10 minutes in the oven, shaking once. Cool slightly, chop coarsely and set aside.
Combining the Fruit Cake Ingredients:
Sift the flour and salt into a bowl. In an electric mixer on high speed, beat the butter and sugar for at least 5 minutes until it turns pale and fluffy. Add the ground almonds, then very gradually the eggs, mixing well between each addition. Fold in the flour with a large metal spoon and then the soaked fruits (and any liquid) and nuts.
Spread the batter into the pan. Bake on an oven rack in the lower third of the oven for about 2 1/2-3 hours. If a wooden toothpick inserted into the center comes out clean, it is ready. If it browns too much before it is fully cooked, make a circle of foil a bit larger than the cake, pierce a hole in the center and open it up, then place it over the pan.
Let cool in the pan. Pierce all over with a wooden toothpick and evenly sprinkle over the remaining 3 tablespoons brandy. Remove from the pan and discard the paper. Wrap in fresh parchment paper, then aluminum foil, and let stand for a week or up to three months. Unwrap and sprinkle with with 1 tablespoon more brandy every other week, if you like, for extra succulence and booziness!
Preparing the Wedding Cake Boards and Pans:
Thin cake boards are used only while you are assembling the cakes, and really serve to save your work surfaces. You can use any board you have, even plywood. Thick cake drums are used to support each tier of the finished cake, so must be bought for this purpose.
Prepare the cake pans and batter (see above). Divide the batter between the pans, filling each to the same depth. The smallest cake will take about 1 hour and 45 minutes, the medium 2 1/2-3 hours and the largest about 3 hours: if a wooden toothpick inserted into the center comes out clean, it is ready. Let cool in the pans. When cooled, pierce all over with a fine wooden skewer and sprinkle with the brandy. Wrap in fresh parchment paper, then aluminum foil, until ready to use. You can continue to feed the cakes with 1-2 tablespoons brandy every other week, for a month or two.
Using Marzipan for the Cakes:
Take the 8-inch thin board and place the 6-inch drum on it. Brush 1 tablespoon apricot jam into the center, then place the 6-inch cake on top, upside down so the flat bottom forms the surface. If it is slightly smaller than the drum, make a strip of marzipan as wide as the side of the cake and the same circumference, and stick it to the edge. Similarly, all cakes should be the same height. If not, apply an extra-thin marzipan layer to the top of the shallow cake (use the pan as a guide). Repeat for the other cakes, placing the 8-inch cake on the same-size drum and 10-inch board, and the 10-inch cake on the same-size drum and 12-inch board.
Brush the 6-inch cake with jam. Knead 1 3/4 pounds of marzipan until pliable. Sprinkle a work surface and rolling pin with confectioners’ sugar, and roll out into a rough square slightly larger than the top and sides of the cake and drum and about 1/4-inch thick. Lift on to the cake and drum, smooth all over and cut away any excess. Cover the other two cakes, using 2 1/4 pounds marzipan each. Leave overnight to firm up.
 |
| Flickr/The British Monarchy |
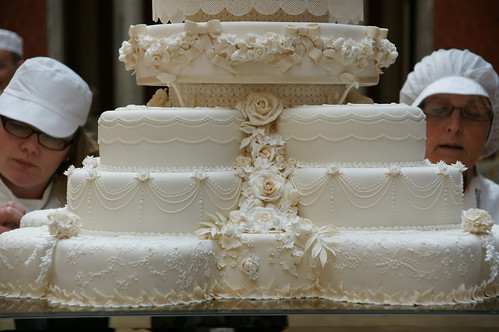
Assembling the Wedding Cake:
Items Needed for Cake Construction:
12-inch square (1/2-inch thick) cake drum and eight wooden dowels
Ingredients for Covering the Cake:
Confectioners sugar, for rolling
9 pounds ivory fondant
2 tablespoons brandy or boiled water
2/3 cup royal icing in a parchment paper cone
Preparing the Base Drum:
Dust the 12-inch drum with confectioners sugar and sprinkle with a small amount of water. Knead 2 1/4 pounds of the fondant until pliable, then sprinkle a work surface and rolling pin with confectioners sugar and roll it into a rough square slightly larger than the top of the drum and about 1/8-inch thick. Wrap it loosely around the rolling pin and lift on to the drum. Smooth with your hands and trim away any excess. Replace the excess in a plastic bag and seal. Let dry overnight.
Preparing the Icing Cover for the Cake:
The 6-inch cake will need about 1 3/4 pounds of fondant, and the two larger cakes about 2 1/4 pounds each. Work on just one cake at a time.
For each cake, brush brandy all over the marzipan. This helps the fondant to stick and is an antiseptic. Lightly dust a clean surface with confectioners’ sugar and roll out the fondant into a rough square about 1/4-inch thick and slightly larger than the diameter of the cakes, their sides, and the drums.
Lift the fondant with your hands, place it over the cake and gently smooth, covering the cake and drum. Do not stretch, and work as quickly as you can, before it dries. Cut away any excess, provided it is still clean, and seal in a plastic bag. Let the three cakes stand overnight.
Building the Cake:
Spread 1-2 tablespoons royal icing into the center of the base drum. Gently ease away the largest cake and drum from its board using an icing spatula and place it exactly in the middle of the base drum.
Now insert four dowels into the large cake, spacing them to form the corners of a square just within where the 8-inch cake will sit. Push down each stick until it hits the drum, and mark with a pen about 1/8-inch above the surface. Remove each stick, score with a knife at the mark, snap (or saw) and discard the excess. Replace each in its hole.
Spread a spoonful of royal icing into the center of the largest cake, remove the 8-inch cake and drum from its thin board and center on top of the larger cake, resting the drum on the hidden dowels. Repeat the dowel placing process with this middle tier to add the top cake, again using a spoonful of royal icing to keep it steady.
Preparing the Decorations for the Cake:
 |
| Flickr/The British Monarchy |
Confectioners sugar, for rolling
Set of 3 blossom plunger cutters (1/4-inch, 1/2-inch and 5/8-inch)
1 1/4-inch butterfly cutter
2 tablespoons royal icing in a parchment paper cone
100 small gold dragees in 2 sizes (optional); I used 50 medium and 50 small gold dragees
1 small paint brush
1 large egg white, lightly beaten (or 2 teaspoons dried egg white mixed with water until frothy)
Edible gold glitter
Two small artificial ivory or white doves (or other birds)
For the Top Tier: 2 feet long, 1 1/2-inch wide vintage gold ribbon
For the Middle Tier: Cream organza about 1 yard long, 1 1/2-inch wide and gold ribbon 6 1/4 feet long and 1/4-inch wide.
For the Bottom Tier: Gold bejewelled ribbon about 4 feet long and 2 1/2-inch wide.
For the Base Drum: One roll double-sided sticky tape and ivory ribbon about 4 1/2 feet long, 1/2-inch wide.
 |
| Flickr/The British Monarchy |
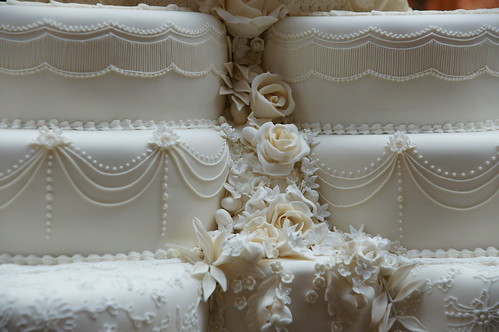
You will need about 12-15 butterflies and about 100 blossoms in three sizes (I made 25 tiny 1/4-inch blossoms, 25 medium 1/2-inch blossoms and 50 large 5/8-inch blossoms).
The decorations are applied randomly, so this is just a guide. Knead some of the fondant left over from covering the cakes and drums until pliable, and roll out thinly (no more than 1/8-inch thick) on a board sprinkled with a little confectioners’ sugar. Stamp out the blossoms and butterflies and allow to dry for a few hours, preferably overnight. I lay them out as I make them in boxes interleaved with parchment paper. Prop up the butterflies’ wings between two sticks (you could use spare dowels), so the wings will dry as if in flight.
If you like, pipe the centers of the blossoms with a tiny dot of royal icing and then press on a gold dragee. If you prefer, just pipe a dot for the centers. Once the butterflies are dry, paint the edges of the wings with egg white and dip into the glitter.
To finish the cake, apply the ribbons by sticking them at the back of each cake using a little royal icing. On the middle tier, overlay the wide organza ribbon with two bands of narrow gold ribbon. Wrap the base drum with the double-sided sticky tape, then stick on its ribbon.
Casual, informal designs do have one huge advantage: any blemishes or marks in the icing can be covered by a decoration! Randomly apply the butterflies and little blossoms all over the three-tiered cake, sticking on with the royal icing. As a final touch, place the two doves in the center of the top tier.
***********************
LAST DAY! LAST CHANCE!

***********************
 |
| Flickr/The British Monarchy; Hugo Burnand The Royal Wedding Group in the Throne Room at Buckingham Palace on 29th April 2011 with the Bride and Groom, TRH The Duke and Duchess of Cambridge in the centre. Front row (left to right): Miss Grace van Cutsem, Miss Eliza Lopes, HRH The Duke of Edinburgh, HM The Queen, The Hon. Margarita Armstrong-Jones, Lady Louise Windsor, Master William Lowther-Pinkerton.Back Row (left to right): Master Tom Pettifer, HRH The Duchess of Cornwall, HRH The Prince of Wales, HRH Prince Henry of Wales, Mr Michael Middleton, Mrs Michael Middleton, Mr James Middleton, Miss Philippa Middleton. |